We've been doing well with our low-carb lifestyle, eating berries by the handful, no fruit crisps, no pies, or tarts . . . for 2 whole weeks! . . . until we needed a "welcome home" pie!
Yes, I know it's a flimsy excuse, but I love pie, and berry season is way too short! A "welcome home pie" is actually pure genius! I get a "slice" of pie, and others get to enjoy the "fruit" (pun intended) of my labor!
If you live in the desert, like me, consider putting in a couple boysenberry or blackberry bushes. In a couple of years, you will have a sizable berry patch!
 Juicy Boysenberries!
We planted our first berry bushes over 15 years ago. They came from new little blackberry plants that grew off the mother plants. We dug them out of a friend's backyard. Will and I sunk a couple 2" x 4" x 8' treated boards into the ground with quickcrete, and strung them with 3 wires for the vines to grow on.
 Our largest boysenberry of the season!
I used a mixture of boysenberries and blackberries in my pie, but raspberries, blueberries, loganberries berries, or marionberries would be great alone or in combination!
BERRY PIE with Easy Food Processor Butter Crust
Makes filling for one 9-inch pie
PIE FILLING
5 cups blackberries and boysenberries combined
3/4 cup of honey, or 3/4 cup pure cane sugar
1 tablespoon fresh lemon juice
1/4 cup minute tapioca
2 tablespoons butter
CRUST
1 cup salted butter, cubed and chilled
2 1/4 cups unbleached flour
1/2 teaspoon salt
8 to 10 tablespoons ice water
2 tablespoons of whole milk, half and half, or heavy cream
- FOR BUTTER CRUST: Place cubed, chilled butter, flour and salt in the food processor.
- Pulse until the mixture resembles pea-size particles.
- Add ice water 1 tablespoon at a time, pulsing twice after each addition.
- Continue adding water and pulsing until dough comes together in large clumps.
- Divide dough in two and place each piece into a sealable sandwich bag; pat each into a flat disc.
- Chill dough for 30 minutes.
- Meanwhile: Prepare filling by first washing and draining fresh berries.
- In a large bowl, add berries, honey/sugar, lemon juice and tapioca.
- Preheat oven to 375F.
- Fold berry mixture with a silicon spatula; mixing well.
- Let berry mixture sit for 15-20 minutes for flavors to blend and tapioca to activate.
- On a lightly floured surface, roll out the bottom crust with a floured rolling pin.
TIP: I begin by patting my dough into a 6-inch disc. Next, I pick it up and add a light dusting of flour beneath. I roll the dough out working from center to the edge. By making a quarter turn of the dough, you keep it from sticking and keep the section you are rolling out (from the center) in front of you.
- Gently place crust in pie pan; adjusting to make sure pastry dough has settled well into the bottom of your pie dish.
- Fill bottom crust with berries and dot with 2-tablespoons of butter.
- Roll out top crust (see TIP); cover the top of pie.
- With one hand underneath, supporting both crusts, trim both layers at the same time with scissors leaving a 2-inch overhang.
- Gently pinch the two crusts together as you roll the 2-inch overhang towards the rim of pie pan; crimp with fingers.
- Brush crust crust with milk/half and half/cream and sprinkle with sugar.
- Cover edge of crust with foil or a metal crust edge cover.
- Cut vent slits into top crust with a sharp knife.
- Place pie on a foil lined, rimmed baking sheet to contain any spills.
- Bake pie 45 to 55 minutes, or until crust is golden brown.
 My friend Tina gave me this beautiful pie dish, filled with a yummy cherry pie, as a birthday gift a few years back.
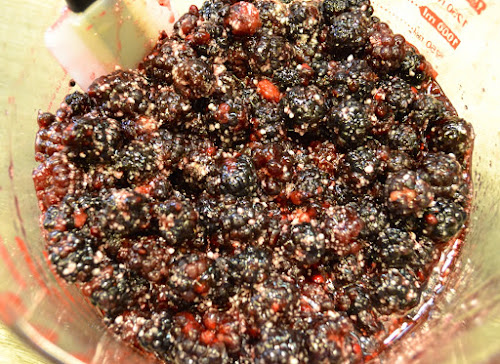
 Berry mixture of berries, lemon juice, honey and minute tapioca.
 Bottom crust adjusted and ready for berry filling.

Crust rolled up, crimped and brushed with half and half, and sprinkled with sugar.
 Steam vents cut into top of crust.
 A golden, flaky, buttery crust is a must when making and eating pies!
Our kids returned from a weeklong 10th anniversary celebration, while we shared a wonderful week with their son, and our grandson, John Isaac!
A "Welcome Home" pie? You betcha!
Our son, Benjamin said this crust was so flaky, it was almost like eating FILO dough. I love using the method of rolling the bottom and top crust together to make the pastry crust edges! The edges are the best part! I know it will make a wonderful crust for a savory chicken pot pie . . . Over at Julie's!!!


No comments:
Post a Comment
Your comments and questions are welcomed . . .